Wednesday, July 27, 2011

Activity Life Cycle Example In Android

Activity Life Cycle ::

Below shows the methods of Activity
a)onCreate()
b)onStart()
c)onPause()
d)onResume()
e)onStop()
f) onDestroy()


The above figure shows how and when activity is created and when it is paused and destroyed.
  • <<kill>> means when the resources are low OS will kill the activity.
onCreate() ::This method is called when first time activity is created.
onStart()::This method is called just before your activity becomes visible on the screen.
onResume()::This method is called after onStart() method and if your activity is the foreground activity on the screen.
onPause()::This method is called when your activity is just about to call another activity so that the current activity has to be paused and the new activity has to be resumed. Here the previous activity is not stopped but it loss the foreground visibility means it goes as background activity.
onStop()::This method is called when your activity is no longer visible on the screen.
onDestroy()::This method is called when your current activity has the last chance to do any processing before it is destroyed.

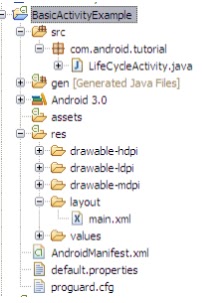
Activity Life Cycle Example ::

Create a new project with the name BasicActivityExample and create a class with the name LifeCycleActivity as a “main” activity.


// LifeCycleActivity.java
package com.android.tutorial;

import android.app.Activity;
import android.os.Bundle;
import android.widget.Toast;

public class LifeCycleActivity extends Activity {
/** Called when the activity is first created. */
@Override
public void onCreate(Bundle savedInstanceState) {
super.onCreate(savedInstanceState);
setContentView(R.layout.main);
Toast.makeText(this, "onCreate()", Toast.LENGTH_LONG).show();
}
@Override
protected void onStart() {
//the activity is become visible.
super.onStart();
Toast.makeText(this, "onStart()", Toast.LENGTH_LONG).show();
}
@Override
protected void onPause() {
super.onPause();
Toast.makeText(this, "onPause()", Toast.LENGTH_LONG).show();
}
@Override
protected void onResume() {
// TODO Auto-generated method stub
super.onResume();
Toast.makeText(this, "onResume()", Toast.LENGTH_LONG).show();
}
@Override
protected void onStop() {
//the activity is no longer visible.
super.onStop();
Toast.makeText(this, "onStop()", Toast.LENGTH_LONG).show();
}
@Override
protected void onDestroy() {
//The activity about to be destroyed.
super.onDestroy();
Toast.makeText(this, "onDestroy()", Toast.LENGTH_LONG).show();
}
}

In the above program we wrote all the Life Cycle Methods. Here Toast.makeText(...) method is used to display the text on the screen.

//main.xml

<?xml version="1.0" encoding="utf-8"?>
<LinearLayout xmlns:android="http://schemas.android.com/apk/res/android"
android:orientation="vertical"
android:layout_width="fill_parent"
android:layout_height="fill_parent"
>

<TextView
android:layout_width="fill_parent"
android:layout_height="wrap_content"
android:text="Wait 10 seconds and see the screen shows how methods are executed.\n
After 10 seconds click on ESC on the keyboard see what methods are executed"
/>
</LinearLayout>

The above program is the best and simple example how the activity methods will execute one by one.Remember when the application is started see the bottom it display's which methods are exeuted when an an activity is running.
After all the few seconds click on ESC in the keyboard or press back button in your emulator then you may see the methods which are executed when an application is destroyed.


PLEASE LET ME KNOW IF U ARE FACING ANY PROBLEMS WITH THIS APPLICATION AND U NEED TO KNOW MORE INFORMATION REGARDING THIS ACTIVITY LIFE CYCLE PLEASE COMMENT IT.


Friday, June 24, 2011

SlideShow of images using android

Here in this session we learn how to create SlideShow using some set of images.Here it is a sample program only.Create a new project with name "SlideShowEx" in eclipse.


As shown above image first open main.xml file
//main.xml
<?xml version="1.0" encoding="utf-8"?>
<LinearLayout xmlns:android="http://schemas.android.com/apk/res/android"
    android:orientation="vertical"
    android:layout_width="fill_parent"
    android:layout_height="fill_parent"
  
    >
<TextView
    android:layout_width="fill_parent"
    android:layout_height="wrap_content"
    android:text="@string/hello"
    />
<Button android:text="Start Slide Show" android:id="@+id/button1" android:layout_width="wrap_content" android:layout_height="wrap_content"></Button>

</LinearLayout>

So from the above code LinearLayout tag is common and in the linearlayout create textview and Button as shown above .Here button is used when we click on button the slide show starts.

//MainActivity.java
import android.app.Activity;
import android.content.Intent;
import android.os.Bundle;
import android.view.View;
import android.view.View.OnClickListener;
import android.widget.Button;
public class MainActivity extends Activity {
    Button button;
    /** Called when the activity is first created. */
    @Override
    public void onCreate(Bundle savedInstanceState) {
        
         super.onCreate(savedInstanceState);
        setContentView(R.layout.main);
        button=(Button)findViewById(R.id.button1);
        button.setOnClickListener(new OnClickListener() {
            
            public void onClick(View v) {
                // TODO Auto-generated method stub
                
                Intent intent=new Intent(MainActivity.this,SlideShow.class);
                startActivity(intent);
                //startDisplay();
            }
        });
    }
    
}
Here in MainActivity.java file first we get the Button object from main.xml file using findViewById(..) function write the code like when user clicks the button it has to move to next activity using intent.Here nothing is special but in the next activity i.e in SlideShow.java we wrote the code for slide show.

create one more xml file in layout folder with the name slideshow.xml(res/layout/slideshow.xml)
//slideshow.xml
<?xml version="1.0" encoding="utf-8"?>
<LinearLayout

  xmlns:android="http://schemas.android.com/apk/res/android"
 
  android:layout_width="match_parent"
  android:layout_height="match_parent"
  android:orientation="vertical"
  android:id="@+id/slideshow_layout"
  >

    <TextView android:text="10"
              android:id="@+id/textView1"
              android:layout_width="fill_parent"
              android:layout_height="wrap_content"></TextView>
   <ImageView android:id="@+id/imageView"
              android:layout_width="wrap_content"
              android:layout_height="wrap_content"
              android:layout_marginTop="80px"
              android:layout_marginLeft="65px"
              ></ImageView>

             
</LinearLayout>

From the above code two things are important one is TextView tag and ImageView tag.These two object's are used in SlideShow.java file.
//SlideShow.java
import android.app.Activity;
import android.os.Bundle;
import android.os.Handler;
import android.os.Message;
import android.widget.ImageView;
import android.widget.TextView;

public class SlideShow extends Activity{
    private TextView txtStatus;
    private ImageView imageView;
    int i=0;
    int imgid[]={R.drawable.sample_0,R.drawable.sample_1,R.drawable.sample_2,R.drawable.sample_3,R.drawable.sample_4,R.drawable.sample_5,
            R.drawable.sample_6,R.drawable.sample_7};
    RefreshHandler refreshHandler=new RefreshHandler();
    
    class RefreshHandler extends Handler{
        @Override
        public void handleMessage(Message msg) {
            // TODO Auto-generated method stub
            SlideShow.this.updateUI();
        }
        public void sleep(long delayMillis){
            this.removeMessages(0);
            sendMessageDelayed(obtainMessage(0), delayMillis);
        }
    };
    public void updateUI(){
        int currentInt=Integer.parseInt((String)txtStatus.getText())+10;
        if(currentInt<=100){
            refreshHandler.sleep(2000);
            txtStatus.setText(String.valueOf(currentInt));
            if(i<imgid.length){
                imageView.setImageResource(imgid[i]);
                
                // imageView.setPadding(left, top, right, bottom);
                i++;
            }
        }
    }
    @Override
    protected void onCreate(Bundle savedInstanceState) {
        // TODO Auto-generated method stub
        super.onCreate(savedInstanceState);
        setContentView(R.layout.slideshow);
        this.txtStatus=(TextView)this.findViewById(R.id.textView1);
        this.imageView=(ImageView)this.findViewById(R.id.imageView);
        updateUI();
    }

}Please see the above SlideShow.java code once again here  i am using threading concept using the threading concept only i am able to do slide show of images.Here my technique is threading only.Because if we display anything on the static screen once we cannot change the component's on screen in dynamical way.But by using threading condept we can change the view's state on the screen.
when the SlideShow.java starts executing first it touches onCreate(...) method i think every one know's about this in the onCreate(..) method i wrote the code for take the TextView,ImageView object's are taken from slideshow.xml file.

          Generally threading concept is handled by Handler class in android.Here i kept some sample images we can use any images and keep them in drawable folder.

    Don't forget to add this following statement in Manifest.xml file
      <activity android:name=".SlideShow" ></activity>    
 
If u face any problems please give me replay in terms of  comment to this tutorial.


Friday, June 10, 2011

How To Use startActivityForResult method in android

In the previous discussion we got some information about how to use Intent class in the android. Mainly Intent class is used for moving from one frame to another frame or we can say like this also Intent class is used for moving from one screen to another screen in the same application or some times navigate to other application screen also.Ok now what is the need for startActivityForResult() method in the application?

                       Intent's are used to move forward from one screen to another screen and after moving forward if we want to move backward then we have to use startActivityForResult(....) method.In the following example i will show u how to use startActivityForResult(..) method along with Intent class in the application.

Try to create a new application in eclipse and here i am creating the application with the name StartActivityForResultExample .

//CurrentActivity.java
import android.app.Activity;
import android.content.Intent;
import android.os.Bundle;
import android.view.View;
import android.view.View.OnClickListener;
import android.widget.Button;

public class CurrentActivity extends Activity {
    /** Called when the activity is first created. */
    @Override
    public void onCreate(Bundle savedInstanceState) {
        super.onCreate(savedInstanceState);
        setContentView(R.layout.main);
        Button button=(Button)findViewById(R.id.button1);
        button.setOnClickListener(new OnClickListener() {
          
            public void onClick(View v) {
                // TODO Auto-generated method stub
                Intent intent=new Intent(CurrentActivity.this,NextActivity.class);
                startActivityForResult(intent, 0);
              
            }
        });
    }
}


So in the above java file observe the code in onClick(...) method.There the code u have to observe is like this

Intent intent=new Intent(CurrentActivity.this,NextActivity.class);
startActivityForResult(intent, 0);

As u know Intent class is used to navigate from one activity to another activity and the next line is startActivityForResult(intent,0) here 'intent' object is given as one parameter and another parameter here is '0' here why i am giving zero is here we can give any number .So that number is treated as id for that particular intent because if multiple intent's are used the based on this id we can find the which intent is active now.

In the next step i am writing the main.xml(res/layout/main.xml)
//main.xml
<?xml version="1.0" encoding="utf-8"?>
<LinearLayout xmlns:android="http://schemas.android.com/apk/res/android"
    android:orientation="vertical"
    android:layout_width="fill_parent"
    android:layout_height="fill_parent"
    android:background="#ffffff"
    >

<Button android:text="Next"
        android:id="@+id/button1"
        android:layout_width="wrap_content"
        android:layout_height="wrap_content"
        android:textColor="#000000"
        ></Button>
</LinearLayout>

Here in main.xml i am just creating one button so when we click on this button then we can move to next activity.

In the next step we write the code for NextActivity.java
//NextActivity.java
import android.app.Activity;
import android.content.Intent;
import android.os.Bundle;
import android.view.View;
import android.view.View.OnClickListener;
import android.widget.Button;

public class NextActivity extends Activity{
    @Override
    protected void onCreate(Bundle savedInstanceState) {
        // TODO Auto-generated method stub
        super.onCreate(savedInstanceState);
        setContentView(R.layout.nextactivitymain);
        Button button2=(Button)findViewById(R.id.button2);
     
        button2.setOnClickListener(new OnClickListener() {
           
            public void onClick(View v) {
                // TODO Auto-generated method stub
                Intent intent=new Intent();
                setResult(RESULT_OK, intent);
                finish();
               
            }
        });
      
    }

}

Please observe the code in onClick(...) method here i am creating one intent with out any parameters and giving the intent object to setResult(...) method if the result is acceptable then we give the parameter as RESULT_OK and after this finish() method get executed because the NextActivity class knows because of which intent this NextActivity is activated so it goes back to CurrentActivity class.

For the NextActivity class i am creating new xml file and it is created in res/layout folder and its name is nextactivitymain.xml
//nextactivitymain.xml
<?xml version="1.0" encoding="utf-8"?>
<LinearLayout
  xmlns:android="http://schemas.android.com/apk/res/android"
  android:layout_width="match_parent"
  android:layout_height="match_parent"
  android:orientation="vertical"
  >
    <Button android:text="Back" android:id="@+id/button2" android:layout_width="wrap_content" android:layout_height="wrap_content"></Button>
   
</LinearLayout>
Please observe the code once again if u have any doubts the please comment to this tutorial

Note::Don't forget to give the NextActivity class information in AndroidManiFest.xml file.
<activity android:name=".NextActivity" ></activity>


Wednesday, June 8, 2011

How to use Intent in the applications

In today's discussion we are going to use Intent function in the Activity class.
First of all i would like to say some information about the Intent class and it's useful in real time applications.
Consider an example we try to display some screen shot in the opening page after that i want to move from one screen to another screen then in that case we should use the Intent class .

See the following example how the intents are useful to move from one screen to another screen.
Create one application with some name like IntentExample.In that application try to create java class as MainActivity.java and this activity should extend Activity class.

//MainActivity.java
import android.app.Activity;
import android.content.Intent;
import android.os.Bundle;
import android.view.View;
import android.view.View.OnClickListener;
import android.widget.Button;

public class MainActivity extends Activity {
    /** Called when the activity is first created. */
    @Override
    public void onCreate(Bundle savedInstanceState) {
        super.onCreate(savedInstanceState);
        setContentView(R.layout.main);
        Button button=(Button)findViewById(R.id.button1);
        button.setOnClickListener(new OnClickListener() {
            
            public void onClick(View v) {
                // TODO Auto-generated method stub
                Intent intent=new Intent(MainActivity.this,NextActivity.class);
               
                
            }
        });
    }
}

I will explain some information about the above java code.

Generally if we create any activity then our activity should extend Activity class and out activity class can override some functions in activity class those are like onCreate(..),onStart(),onResume(),onPause(),onStop(),onDestroy().These functions are important for any activity here onCreate() function is called whey the application is first time started and from next time when we interact with application then onStart() function is executed and onResume() function is when we put the appliaction in pause the we get the information back...etc.........I will explain about every function in the following tutorials now just try to know about the basic knowledge of these functions.
      In the above described java code we used only onCreate() function.I think u may get the doubt like what about the onStart() function here in our code it is not used.............yes it is there in Activity class so when the application calls the onStart() function first it check's our MainActivity.java class if it is not there in our java class it check's in the Activity.java class since this function is already described in Activity class this function is called in the Activity class............Ok

how to call the next screen or next activity from our java class is as follows.

Intent intent=new Intent(MainActivity.this,NextActivity.class);

In my application i created a button in the main.xml file and the object of that function is taken by findViewById() function.So findViewById(...) function is used to get the xml creted objects .
In the next step i created one function in such a way that when i clicked on the button the onClick function is called so automatically that function executes.
In the onClick() function i called the Intent class. 

Intent intent=new Intent(MainActivity.this,NextActivity.class);
So here i wrote the logic for calling the next screen or next activity.So when creating the Intent object itself we have to give the current class context object as MainActivity.this .Here MainActivity.this is nothing but context object of current class and the next attribute is NextActivity.class file name.So we have to create one more class with NextActivity.java and this activity also should extend Activity class and should override onCreate() fuction so when we are creating new activity then we should extend Acitivity class and should override onCreate() function these are basic try to remember.
NextActivity.java
import android.app.Activity;
import android.content.Intent;
import android.os.Bundle;
import android.view.View;
import android.view.View.OnClickListener;
import android.widget.Button;

public class NextActivity extends Activity{
    @Override
    protected void onCreate(Bundle savedInstanceState) {
        // TODO Auto-generated method stub
        super.onCreate(savedInstanceState);
        setContentView(R.layout.main1);
       
    }

}


In the next step configure the main.xml file
//main.xml
<?xml version="1.0" encoding="utf-8"?>
<LinearLayout xmlns:android="http://schemas.android.com/apk/res/android"
    android:orientation="vertical"
    android:layout_width="fill_parent"
    android:layout_height="fill_parent"
    android:background="#ffffff"
    >

<Button android:text="Next"
        android:id="@+id/button1"
        android:layout_width="wrap_content"
        android:layout_height="wrap_content"
        android:textColor="#000000"
        ></Button>
</LinearLayout>
Here main.xml is used by MainActivity.java.Similarly we have to create one more xml file in res/layout folder.Here i created with the name main1.xml .
//main1.xml
<?xml version="1.0" encoding="utf-8"?>
<LinearLayout
  xmlns:android="http://schemas.android.com/apk/res/android"
  android:layout_width="match_parent"
  android:layout_height="match_parent"
  android:orientation="vertical"
  >
   <TextView 
    android:layout_width="fill_parent"
    android:layout_height="wrap_content"
    android:text="we are now in NextActivity.java screen"
    />
</LinearLayout>


so main.xml is configured in MainActivity.java and main1.xml file is configured in NextActivity.java.Here one thing should be clear when we all any application first it calls MainActivity.java file and from here it call the main.xml file by using setContentView(....) function.So xml files are used to display the static component's like buttons,images ....etc but if we want to make those static components as dynamic then we should use Activity class.

Remember after creating NextActivity.java it's entry is configured in AndroidManifest.xml file as given below
<activity android:name=".NextActivity" ></activity>
In today's discussion we got some knowledge about Intent class and in tomorrow's class we have to discuss about how to move from first screen to next screen and form next screen to first screen.


IF U HAVE ANY DOUBTS THEN PLS SEND REPLY TO THIS AS COMMENTS.......................


Tuesday, June 7, 2011

Hello Android World Example

Please try to follow the steps what i am saying in the begining and then i will explain about the code briefly.
First of all try to create a new project and in that project create the following java class.
STEP 1::
//MainActivity.java
import android.app.Activity;
import android.os.Bundle;

public class MainActivity extends Activity {
    /** Called when the activity is first created. */
    @Override
    public void onCreate(Bundle savedInstanceState) {
        super.onCreate(savedInstanceState);
        setContentView(R.layout.main);
    }
}
STEP 2::
and in the second step  try to configure main.xml (res/layout/main.xml)in the following way.....
<?xml version="1.0" encoding="utf-8"?>
<LinearLayout xmlns:android="http://schemas.android.com/apk/res/android"
    android:orientation="vertical"
    android:layout_width="fill_parent"
    android:layout_height="fill_parent"
    >
<TextView  
    android:layout_width="fill_parent"
    android:layout_height="wrap_content"
    android:text="@string/hello"
    />
</LinearLayout> 
 STEP 3::
and in the third step create a strings.xml(res/values/strings.xml)in the following way..........
<?xml version="1.0" encoding="utf-8"?>
<resources>
    <string name="hello">Hello Android World</string>
    <string name="app_name">AndoridHelloWorldActivityEx</string>
</resources>
now deploy the application into your android supported mobile or android emulator.
Now it will display the output as given below.
So if u see the above window it is an android emulator installed in my computer.If i deploy my application into the emulator the i got the above output.
In the following figure i am showing how the project folders are configured in eclipse are given below.........

 So please see the above image I created a new project in eclipse and the project name is AndroidHelloWorldActivity in the project i created a new package and here the package name i choose is com.ibm and you may choose your own package name there is no restrictions in package name.

In the package i choose a new class called MainActivity.java and it should extend Activity class.
//MainActivity.java
import android.app.Activity;
import android.os.Bundle;

public class MainActivity extends Activity {
    /** Called when the activity is first created. */
    @Override
    public void onCreate(Bundle savedInstanceState) {
        super.onCreate(savedInstanceState);
        setContentView(R.layout.main);
    }
}
  
the MainActivity.java should extend Activity class. I think u may get the doubt like why we should extend Activity class if i explain here u may get confused so pls try to create the application as i said and there after in the following discussions i will explain about everything.
 Here MainActivity is called as activity.What is an activity?
            Activity is nothing but a single screen in the application (just remember like this).
So to display the screen we need a function called onCreate(...).So according to that we created one function and it should call super onCreate(..) function and the next line is 
                               setContentView(R.layout.main);
when this function is called then it will go to res folder in that folder it will check for another folder called layout folder and in the layout folder in check for xml file called main.xml...........
<?xml version="1.0" encoding="utf-8"?>
<LinearLayout xmlns:android="http://schemas.android.com/apk/res/android"
    android:orientation="vertical"
    android:layout_width="fill_parent"
    android:layout_height="fill_parent"
    >
<TextView  
    android:layout_width="fill_parent"
    android:layout_height="wrap_content"
    android:text="@string/hello"
    />
</LinearLayout>

 This xml file is very important because we can display the screens in the application in two way's one is using java functions and another way is using xml files.Here we are using xml file i.e main.xml file.
In the xml file first we need to create <LinearLayout.....> tag in that tag we can declare the textview,buttons,images,editViews etc..........So <LinearLayout> tag is very important.

Then what is the importance of Strings.xml file?
In the main.xml file we created one <TextView > tag see that one line is there like android:text="@string/hello"  here it calls the strings.xml file and in that checks for "hello" name attribute is there or not if it is there then take that string value and display it on the output screen.Here i can't say more than about strings.xml because if u are doing more and more applications u may easily understand the application easily..........................................

After conifiguring all this deploy the application into the emulator u may get the above described output..........................................
IN THE NEXT APPLICATION WE WILL SEE SOME MORE EXAMPLES ON ACTIVITY CLASS.

Introducing my self

Hi guys recently i started this site to share my views's with android interested people in all over the world.First of all i want say about my self. I am a software employee in IBM and i have an experiance in android so i would like to share my view with the android bloggers.